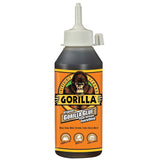
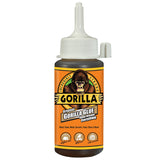
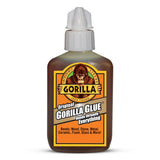
The product that started it all. Original Gorilla Glue built a name for itself with its incredible, industrial holding power and versatility. The water activated polyurethane formula expands into materials to form an incredibly strong bond to virtually anything making Gorilla Glue your solution for almost any project or repair.
Available in 3 Sizes :
59ml - GG41001
118ml - GG41002
236ml - GG41003
APPLICATION TEMPERATURE –Above 4° C, best at room temperature
SERVICE TEMPERATURE – 4° to 93° C
OUTDOOR – Yes
MOISTURE RESISTANT – Waterproof
PAINTABLE –Yes – Can be painted with oil-based and spray. Acrylic/latex and stains require sanding
SANDABLE – Yes
STAINABLE – Yes – Will require sanding
EXPANDS WHEN CURED – Yes
CURED COLOR – Tan
TECHNICAL STANDARDS –ANSI/HPVA Type I
STORAGE TIPS –Store in a cool, dry location. Avoid laundry rooms, under sinks, and kitchen cabinets.
GAP FILLING – No
-
Prepare and Dampen the Surfaces
If you’re using Original Gorilla Glue for the first time, or bonding a new type of material, we always recommend trying a test piece first. To open a bottle larger than 59ml, cut the tip of the nozzle where it comes up to a point and starts to indent. The cap is attached to the side of the nozzle.
Prepare your surfaces: All surfaces must be clean, dust free and tight fitting. For shiny surfaces, such as metals, glass and some plastics, roughen up the material to give the glue something to bite into.
Damp It: Lightly dampen one surface with water. We recommend using a damp cloth or spraying with water. Do not saturate the surface. For dense hardwoods, lightly dampen both surfaces prior to gluing.
-
Evenly Apply Gorilla Glue Onto the Dry Surface
Glue It: Carefully apply onto the dry surface. Do not over apply. We recommend wearing gloves or spreading the glue with a disposable brush. In some instances, Gorilla Glue can be a skin sensitiser. If you are predisposed to skin reactions, please take the extra precaution.
If you do get the glue on your skin, try removing it with a dry cloth or paper towel first (particularly if the glue is still tacky). If that doesn’t work, try washing with soap and cold water, or using an exfoliator with a gritty texture. Dry your skin and apply lotion. We do not recommend using any kind of alcohol or acetone. This actually strips the skin of its natural oils, which means the glue is more likely to stick.
-
Clamp the Two Surfaces Together Tightly
Clamp It: Make sure the clamping pressure is distributed evenly across the surface. Or, if you don’t have a clamp, use heavy objects or Gorilla Tape® to achieve the appropriate clamping pressure. For lighter objects, try using rubber bands to hold the pieces together tightly. Clamp objects for 1–2 hours. For best results, allow 24 hours to cure.
-
Clean up
If you need to remove any uncured “squeeze out” or wet glue, we recommend wiping with a dry cloth or using a standard paint thinner. Make sure to read and follow directions if using a paint thinner. Always wear gloves. Once the glue is dry, it is best removed mechanically: Try sanding, chiseling, scraping or picking. The dried glue will not damage tools.
-
Storage Tips
After each use, wipe the bottle’s lid and nozzle clean with a dry cloth. For 59ml bottles, tightly replace the lid after wiping clean and store in a cool, dry place. For bottle sizes 118ml and larger, we suggest squeezing excess air out of the bottle. While still squeezing, tightly replace the cap and then store in a cool, dry place. This helps eliminate moisture in the bottle.


